Static Website with Hugo, Cloudflare and Automated Builds using Google Cloud
Wed, Aug 14, 2019Motivation
In 2015 I started using Hugo for my private website. I wanted to reduce the time needed to update software and always maintain a secure environement. I even wrote an article about setting up hugo with ssl using Cloudflare (in German) back than. Hugo has evolved a lot since than and it was time for an update. I also decided that I want an automated build system that automatically rebuilds my websites whenever I commit a new post to the repository. There are already some articles that describe some of the parts in my current setup, but I could not find a single article that describes all steps of the automated build setup and therefore I decided to write down how my current setup works so other people could learn from it.
My Setup
My current setup is based on a number of components:
- Private Git repository on Bitbucket
- Google Cloud Space bucket to host the website
- Automated build system using Build-Triggers within Google Cloud Platform
- Cloudflare CDN for HTTPS and Caching
I chose those components because everything except the Google Cloud Services is currently free.
Private Git repository on Bitbucket
There is nothing special about creating and using a Bitbucket repository. You just register for a free bitbucket account, create a new repository and start using it. Here is a screenshot of the repository layout: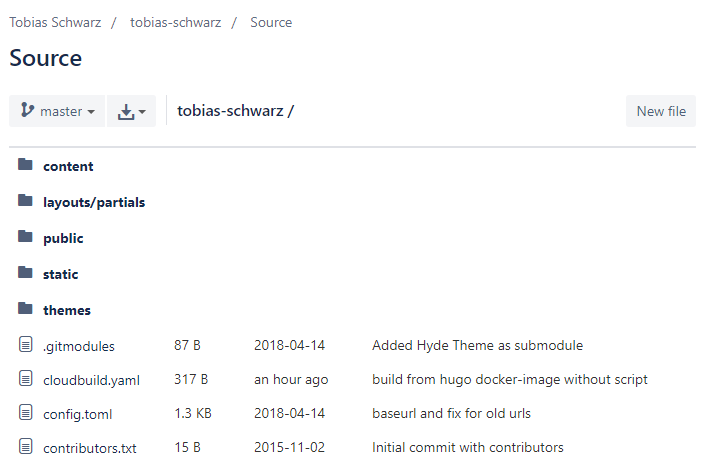
The only thing worth mentioning here is that I added the theme I use as a submodule so I could automatically update it as well. This could be done using:
# Add the theme as submodule
git submodule add git@github.com:spf13/hyde.git themes/hyde

# Init and update the submodule
git submodule init
git submodule update --init --recursive --remote
Google Cloud Space bucket to host the website
I used to use my own webserver to host my websites. However I always needed to update the software and keep everything up and running. I decided to use Google Cloud Space to store my static website because it comes with a number of advantages:
- easy to setup
- fast, relyable and geo replicated
- can be configured to use your own domain
To set it up you head over to the Google Cloud Console and create a project and enable billing.
Than head over to the storage browser, create a bucket, edit the bucket permissions and edit the website configuration.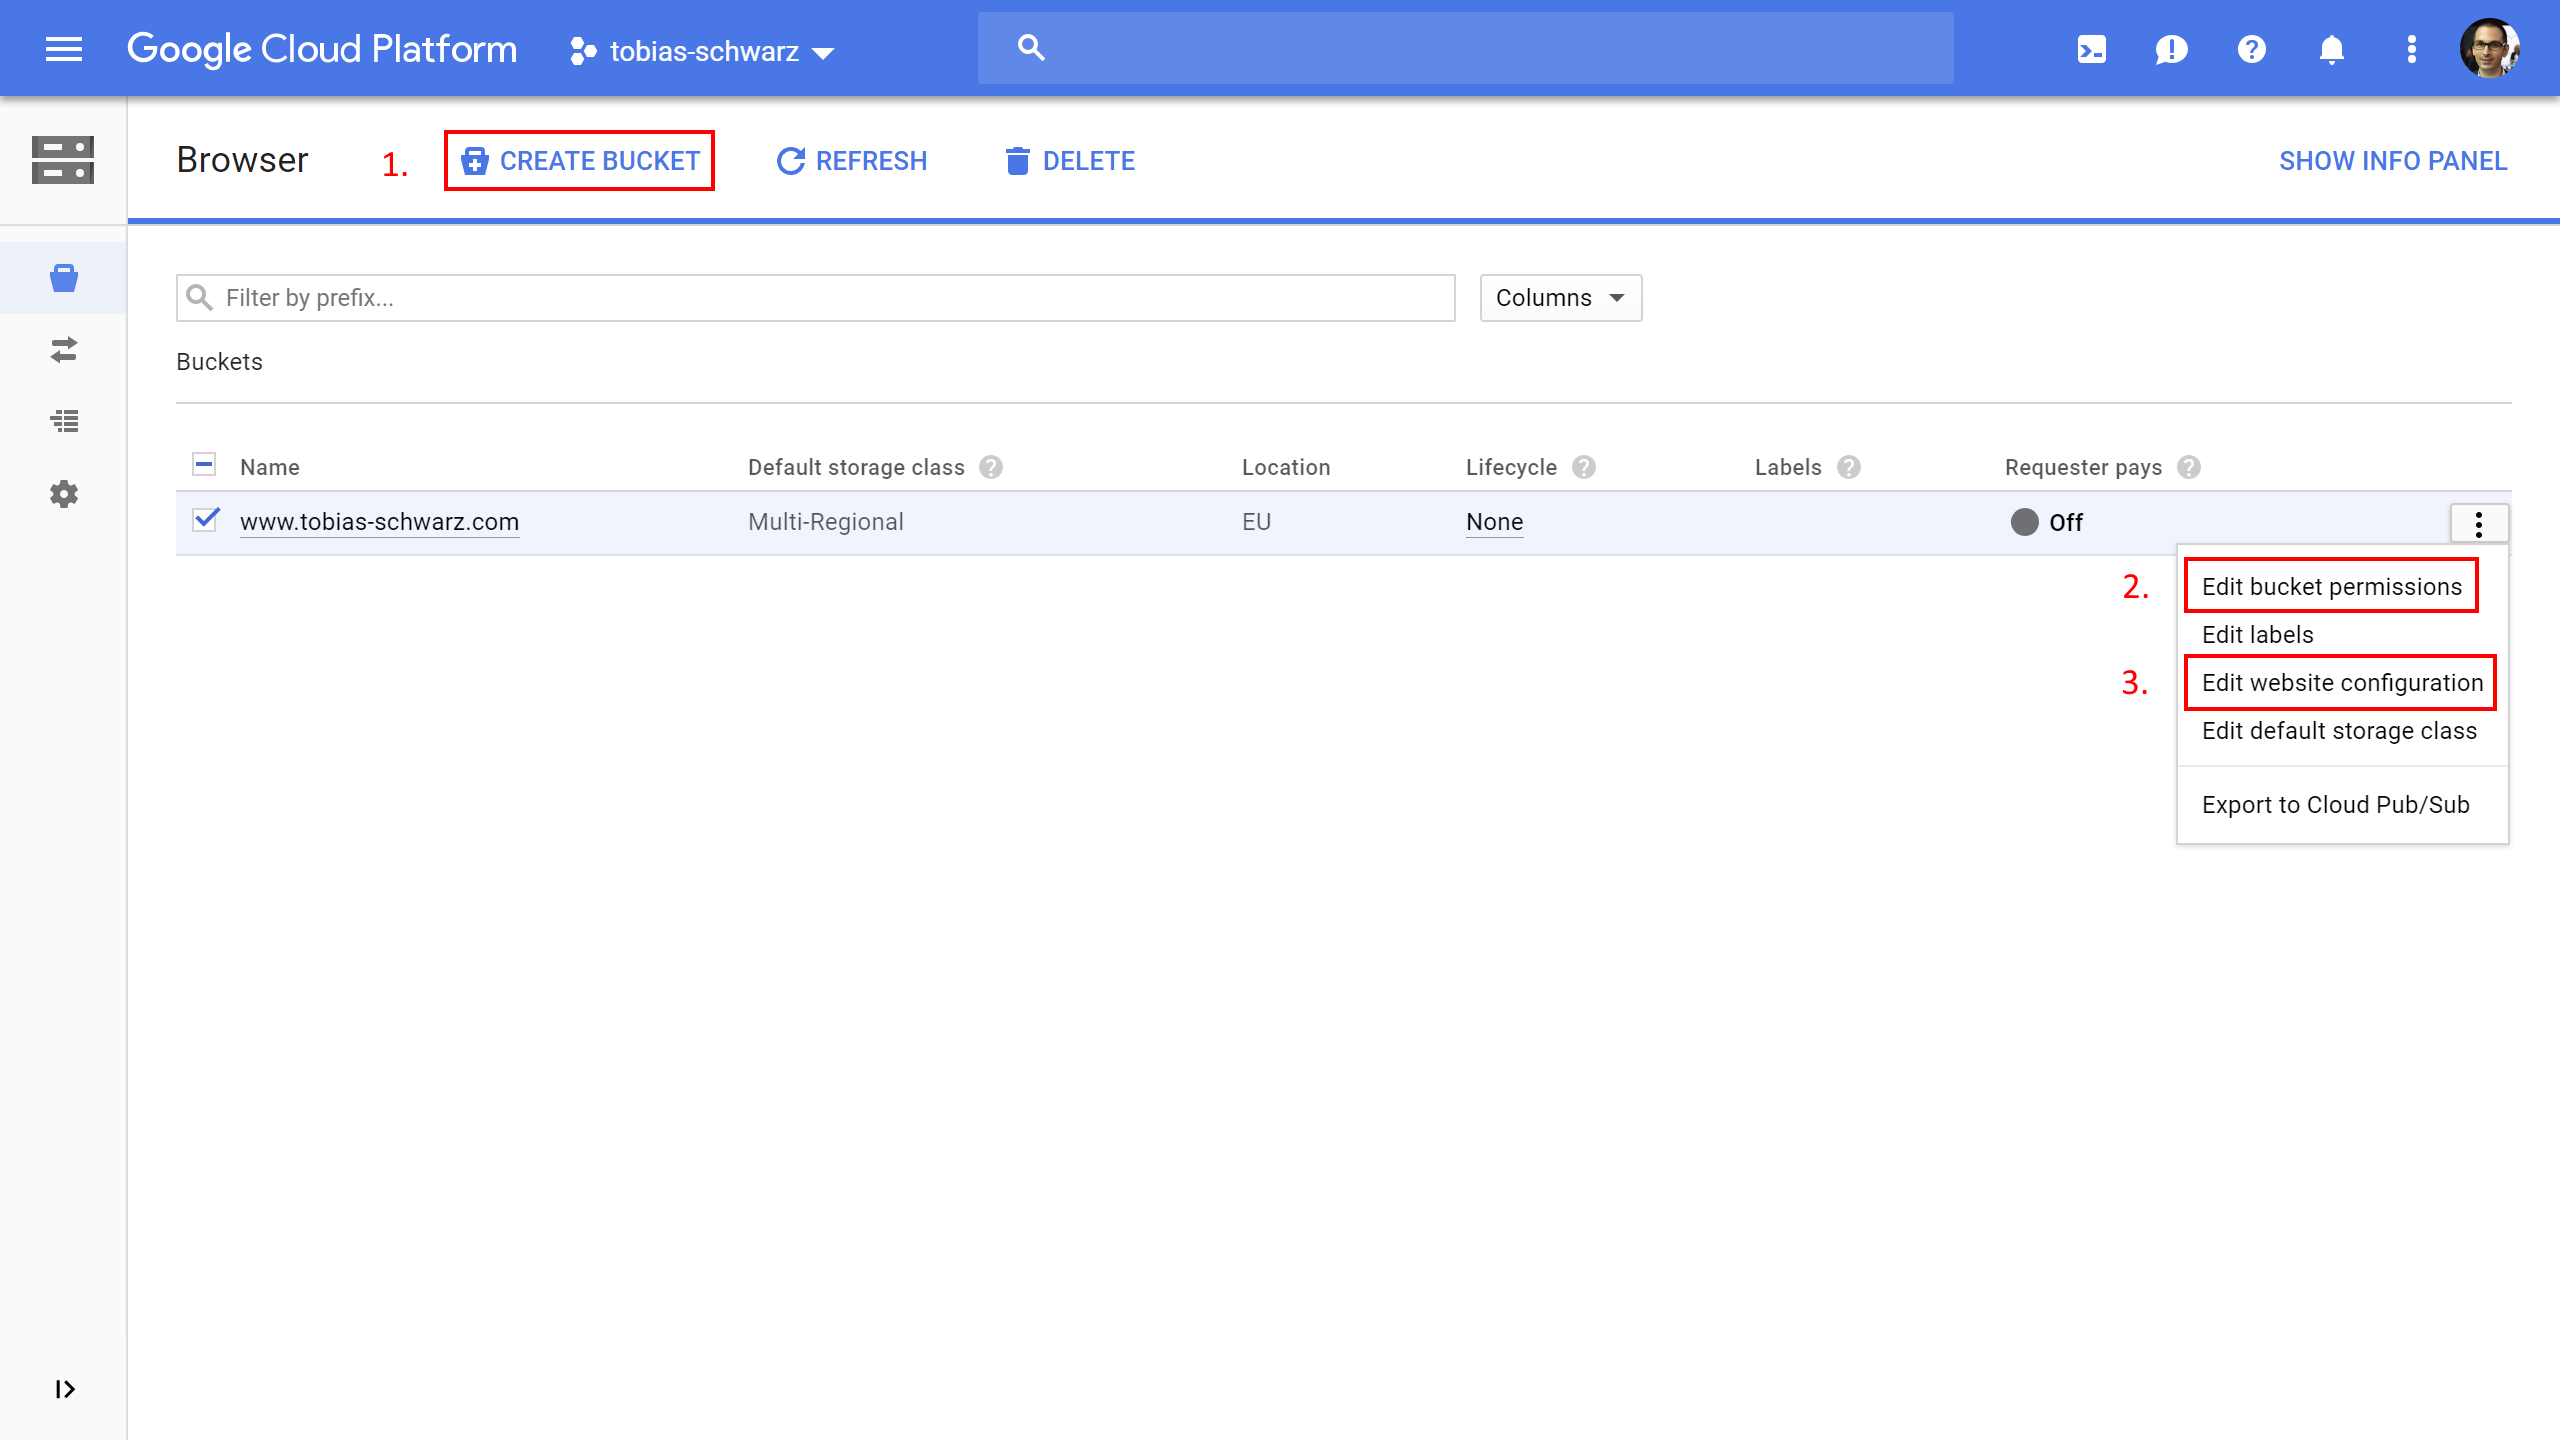
Create a cloud space bucket
When you create the bucket make sure to specify the matching host you want to use for your website. In my case I use www.tobias-schwarz.com. You should than choose Multi-Regional or Regional storage as a default storage class and the best location for your target audience. What’s best depends on what you want to achive. I choose Multi-Regional because I want to get the best performance and Europe because most of my audience is from Europe.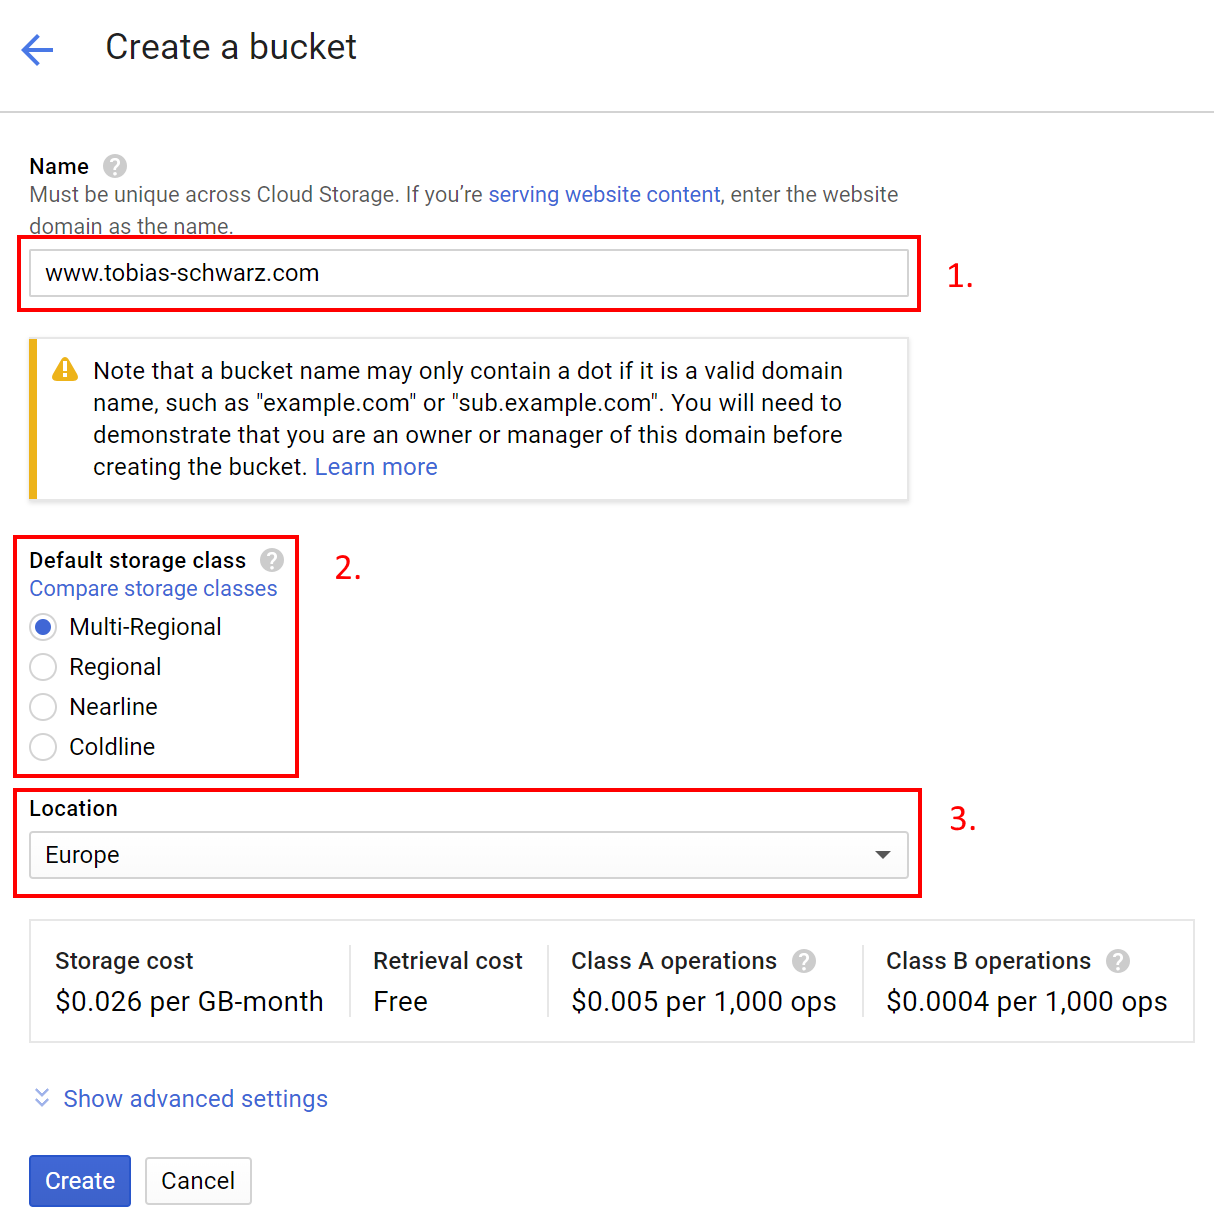
Set permissions for cloud space bucket
By default a bucket is private and not publicly accessably. To change this we have to edit the bucket permissions and add allUsers with the role Storage Legacy Bucket Reader. Note: It is probably better to use the new Storage Object Viewer role now, but I am to lazy to update the screenshots.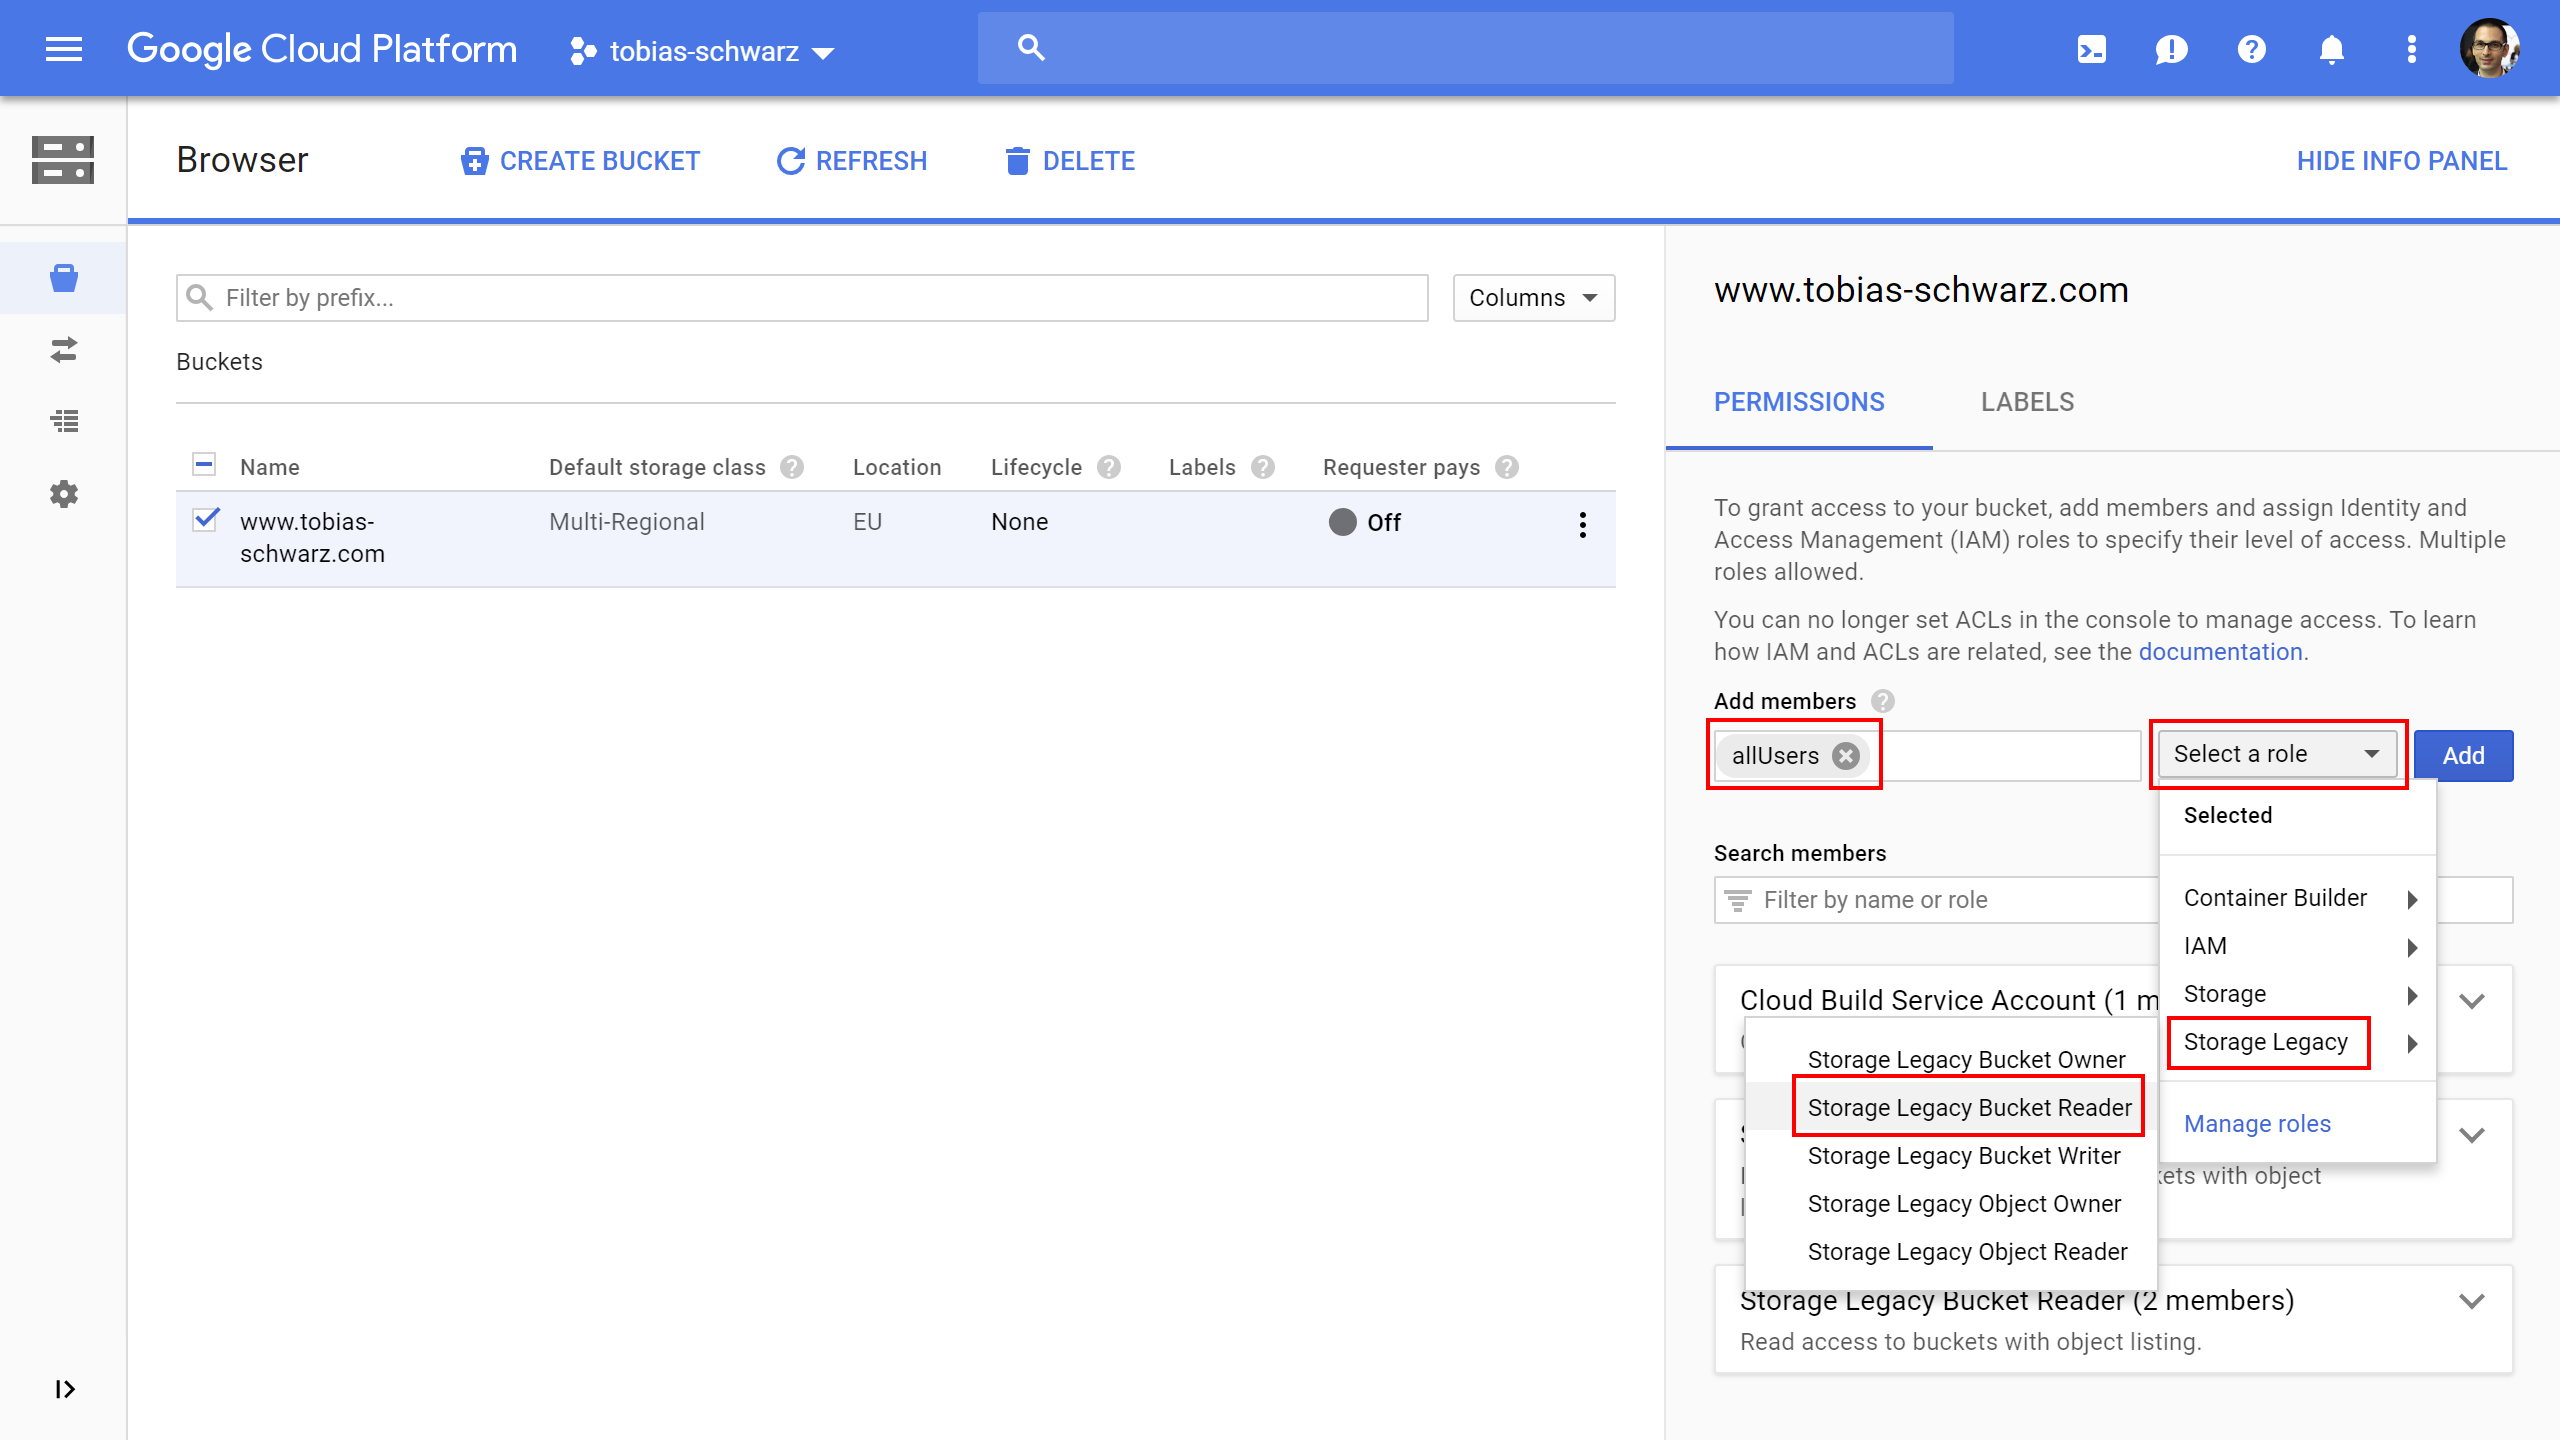
Once added allUsers should be listed as a member with read access.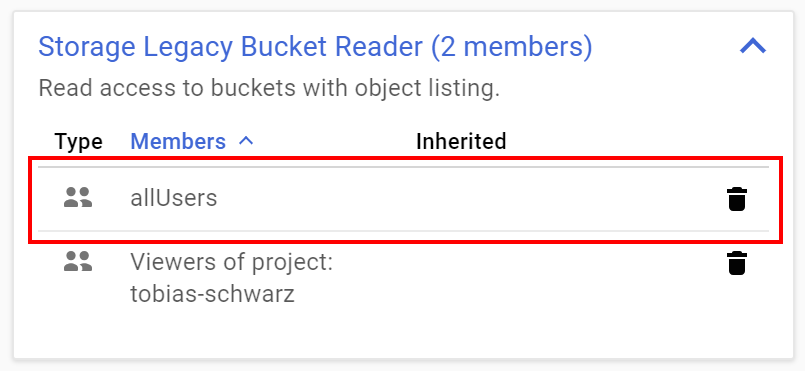
Edit website configuration for cloud space bucket
The last step is to edit the website configuration for our bucket. We can specify a main page and a 404 errorpage here. By default hugo names the main page index.html and the 404 errorpage 404.html. Make sure to save the changes.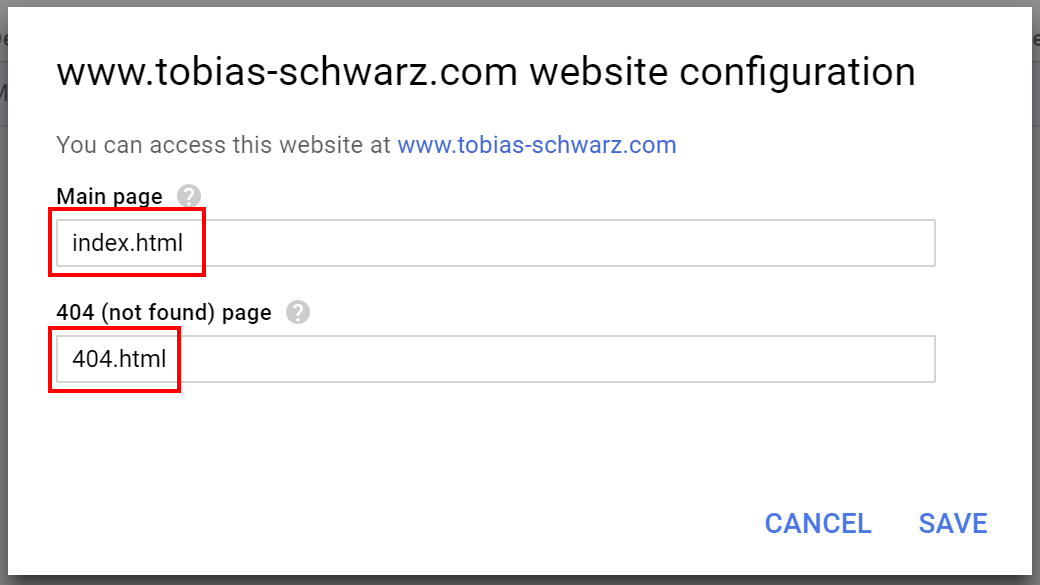
Automated build system using Build Triggers within Google Cloud Platform
Within the Google Cloud you can use built triggers to automate building and deploying your hugo website to the previously created cloud space bucket. Head over to the Build Tools section and create a new trigger for your website.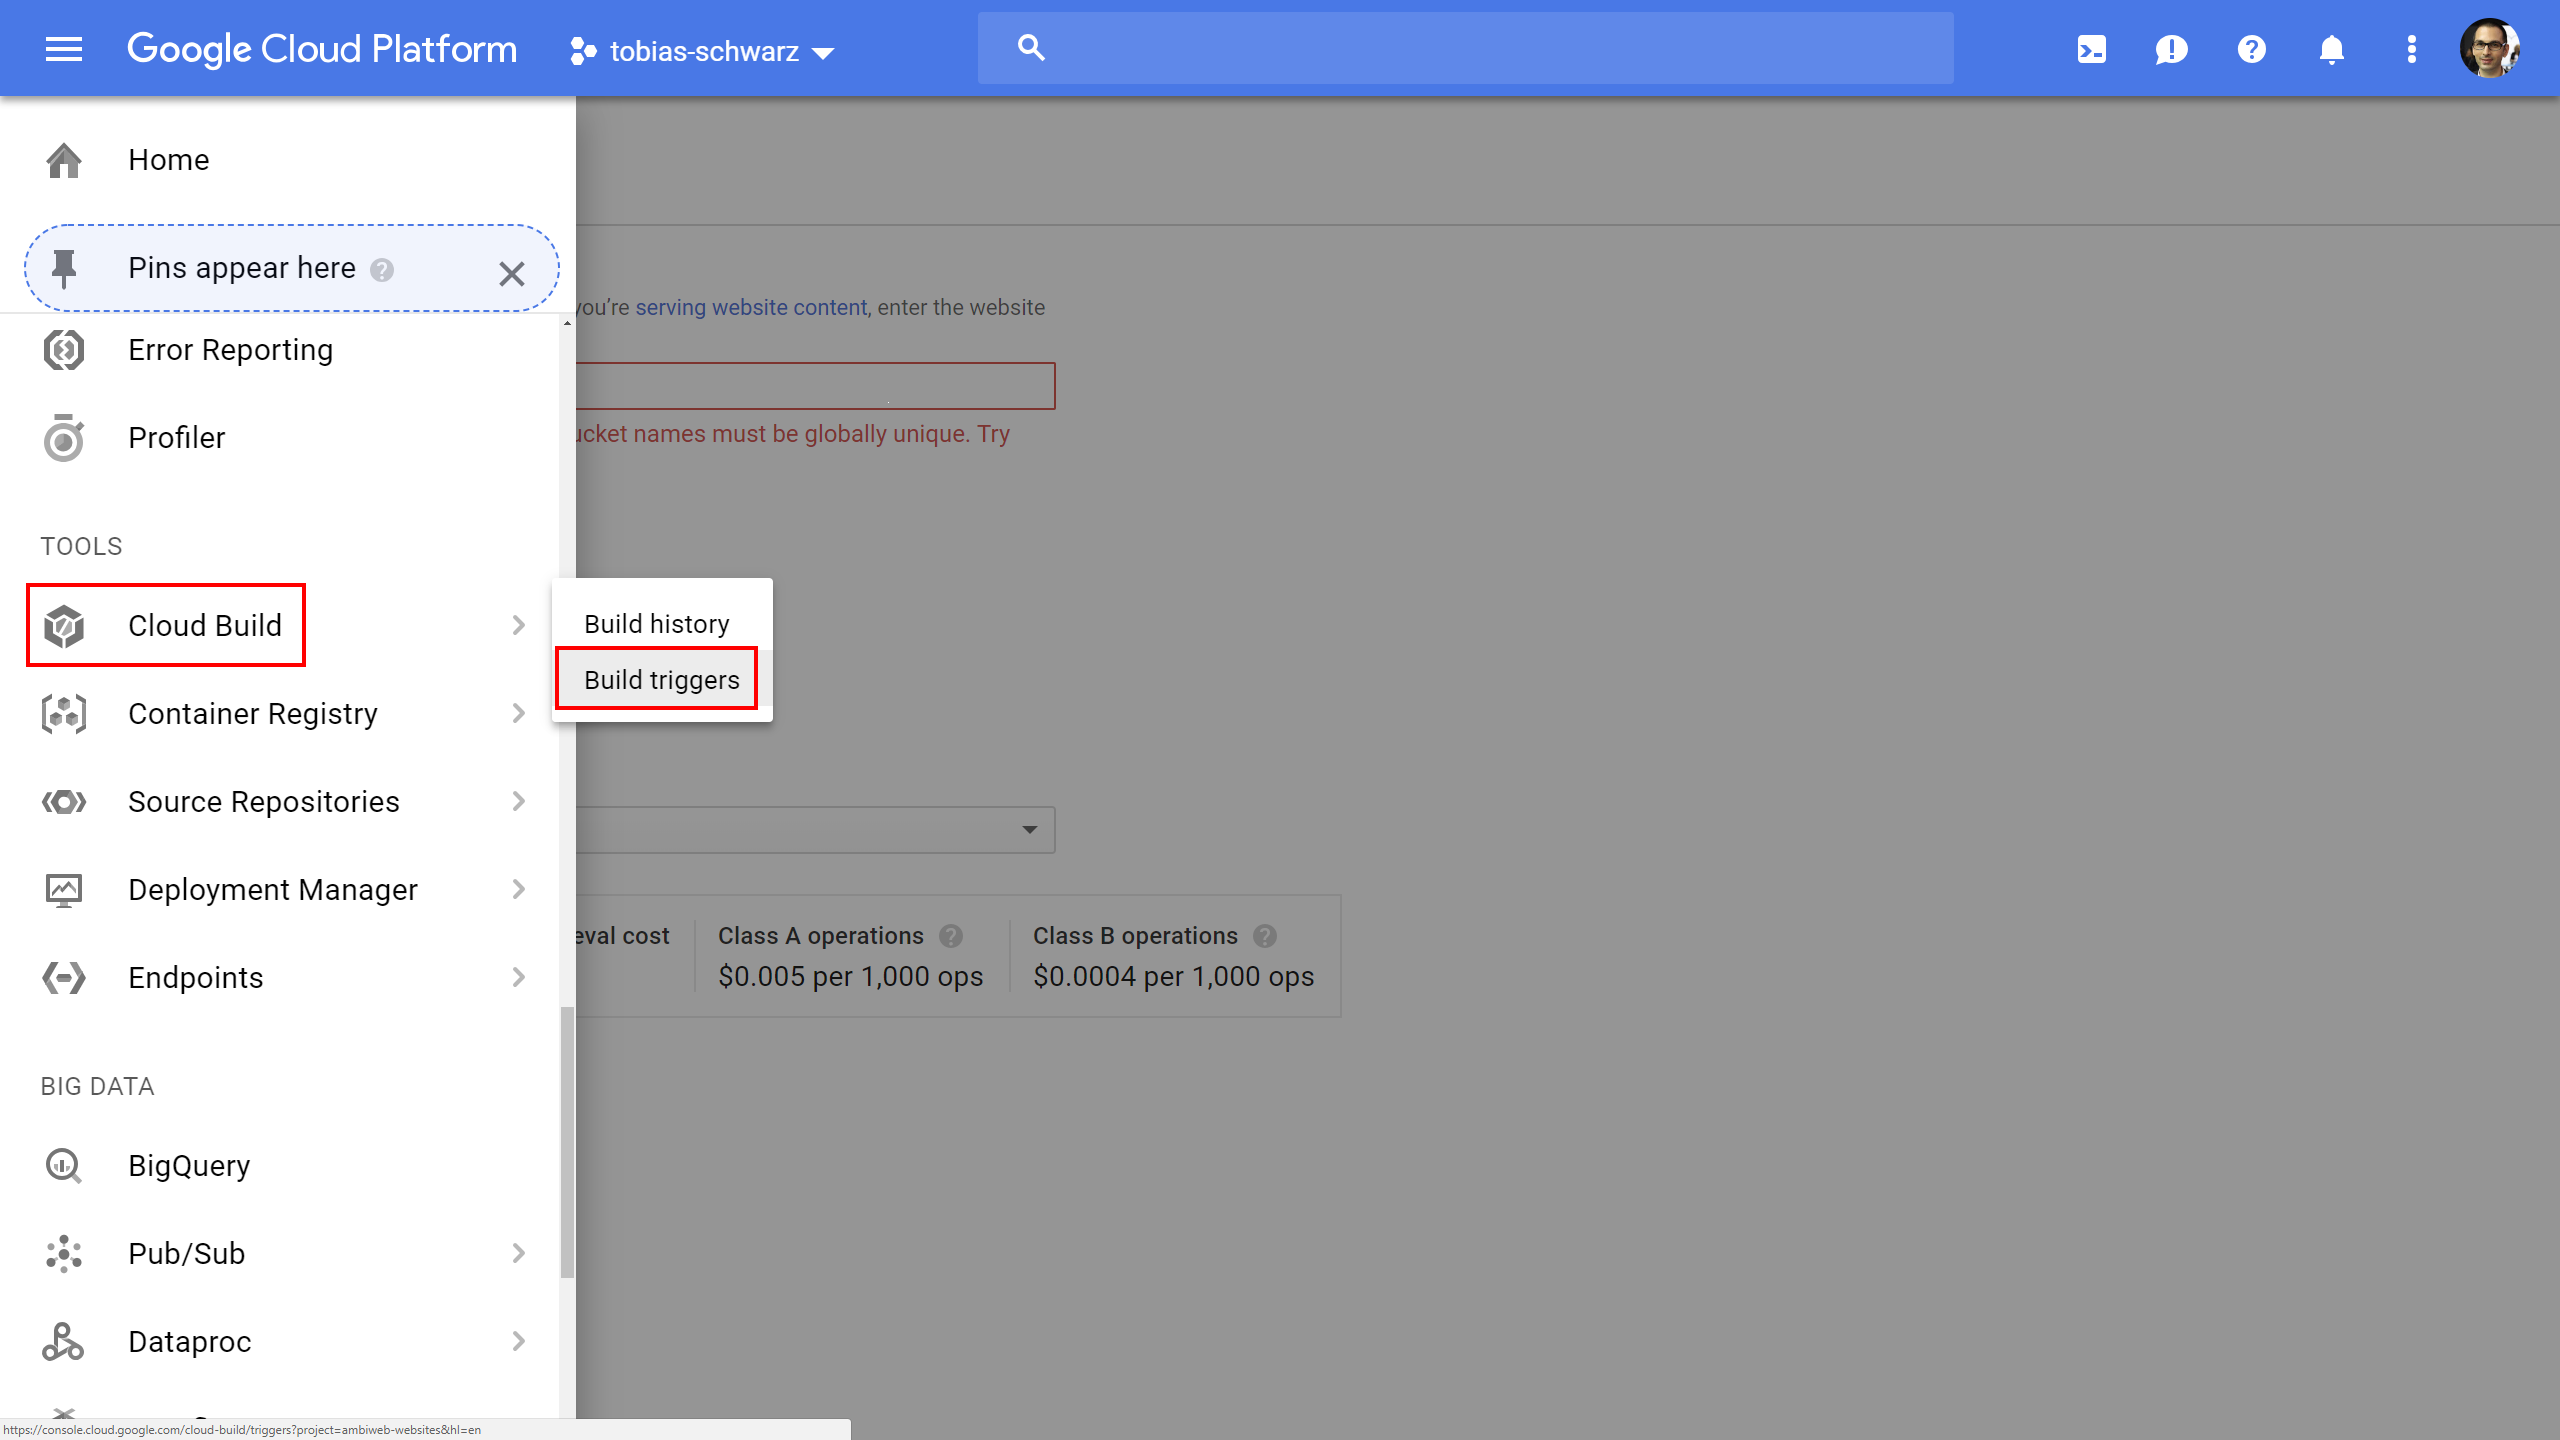
When creating a new trigger you have to select a source repository and perform an authentication. The interesting part is setting the trigger settings. I named my trigger so I could distinguish different triggers in the build logs. I specified that my trigger should only build the master branch and selected that the trigger should use a cloudbuild.yaml file within the root directory of my git repo to build the website.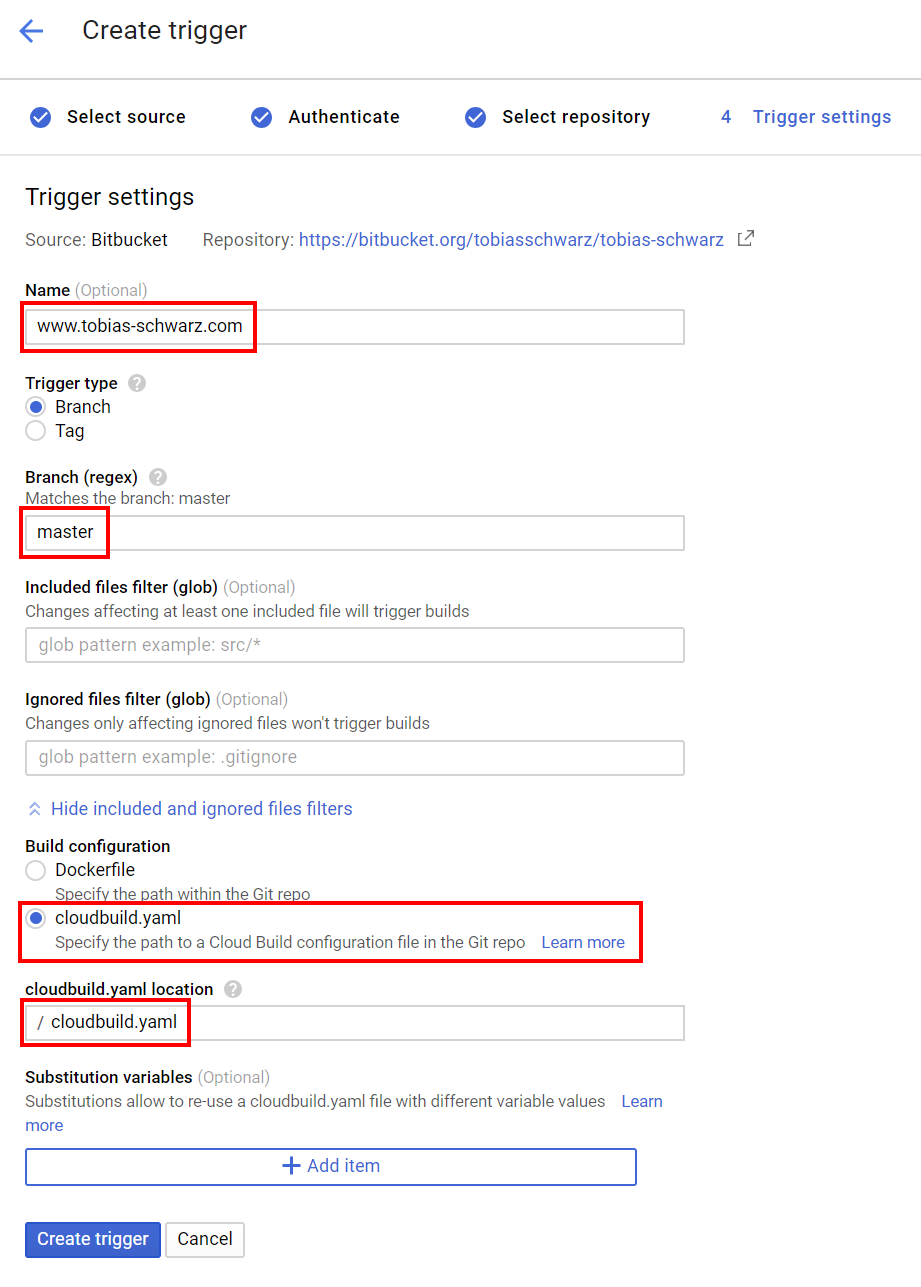
To get the trigger working you need to create a cloudbuild.yaml in the root directory of your git repo and commit it and push it (master branch). My cloudbuild.yaml currently specifies 3 build steps looks like this:
steps:
  - name: 'gcr.io/cloud-builders/git'
    args: ['submodule', 'update', '--init', '--recursive', '--remote']
  - name: 'toschwarz/hugo-builder'
    args: ['hugo', '--minify']
  - name: 'toschwarz/hugo-builder'
    args: ['hugo', 'deploy', '--maxDeletes', '-1']
The first step checks out the latest version of all submodules. In my case this is basically the theme I use. Currently I use a 3rd party theme. However I have plans to create and maintain my own theme to have more control over changes that otherwise might break the build of the website.
The second step tells the Google Cloud Builder to get the hugo image and actually build the website. At the beginning I used a public Hugo build for this available on Docker Hub. This did not work for me since i needed more control over the version number used for the builds. I therefore decided to create my own docker image for hugo and update the hugo version once I verified that all my websites are still building with the newest version. You can easily do so as well. Just fork my github repository, create a free docker hub account and create a automated public build.
The third step syncs the new build to the google cloud space bucket using hugo deploy. Files not present in the new build will be deleted. This also requires that you add deploy instructions to your Hugo config file (e.g. config.toml):
[deployment]
# By default, files are uploaded in an arbitrary order.
# Files that match the regular expressions in the "Order" list
# will be uploaded first, in the listed order.
order = [".jpg$",".png$",".gif$",".css$",".js$"]

[[deployment.targets]]
# An arbitrary name for this target.
name = "gcs"
URL = "gs://www.tobias-schwarz.com"

[[deployment.matchers]]
#  Cache static assets for 20 years.
pattern = "^.+\\.(js|css|svg|ttf)$"
# cacheControl = "max-age=630720000, no-transform, public"
gzip = true

[[deployment.matchers]]
pattern = "^.+\\.(png|jpg)$"
# cacheControl = "max-age=630720000, no-transform, public"
gzip = false

[[deployment.matchers]]
pattern = "^.+\\.(html|xml|json)$"
gzip = true
What I like about the the build steps is, that whenever a step fails the other steps will not be executed. This means that when changes within the template break the hugo build the website will not be updated until you resolve the issues first.
At this point you should be able to push content to your repository and verify the successfull build process in the build logs and by looking at the files in the cloud space bucket.
Cloudflare CDN for HTTPS and Caching
One of the problems of the Google Cloud Space buckets is, that it is not possible to use it with HTTPS under your own domain out of the box. It can be done using additional services from Google but not free of charge. I therefore decided to add a Cloudflare layer. This brings a number of benefits:
- Free SSL certificats
- HTTP2
- Performance boost and reduced cost for the Google Cloud
- Caching of files on Cloudflare servers
- Minification of HTML and static ressources
- Redirects for HTTP URLs and non-www URLs
- DDOS protection
To set it up I first registered for a Cloudflare account and added my domain. I followed the instructions to change the nameserver of my domain to the DNS servers operated by Cloudflare. Than I changed the DNS record for the top level domain and the www-subdomain I use for my Google Cloud Space Bucket and made sure both are handled by Cloudflare.
I than headed over to the crypto settings and activated “Full SSL”. This forces Cloudflare to request all resources from the Cloud Space Bucket using a HTTPS connection, but it will not validate the certificate. In addition I activated Always use HTTPS which redirects all HTTP requests to HTTPS.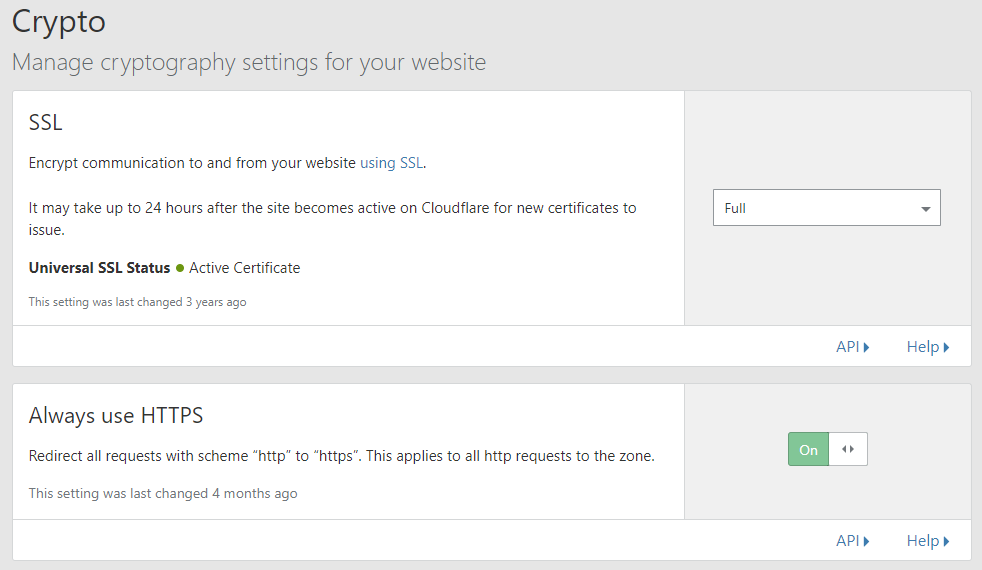
As a last step I added a page rule that redirects all requests of the top level domain tobias-schwarz.com to the www-subdomain www.tobias-schwarz.com.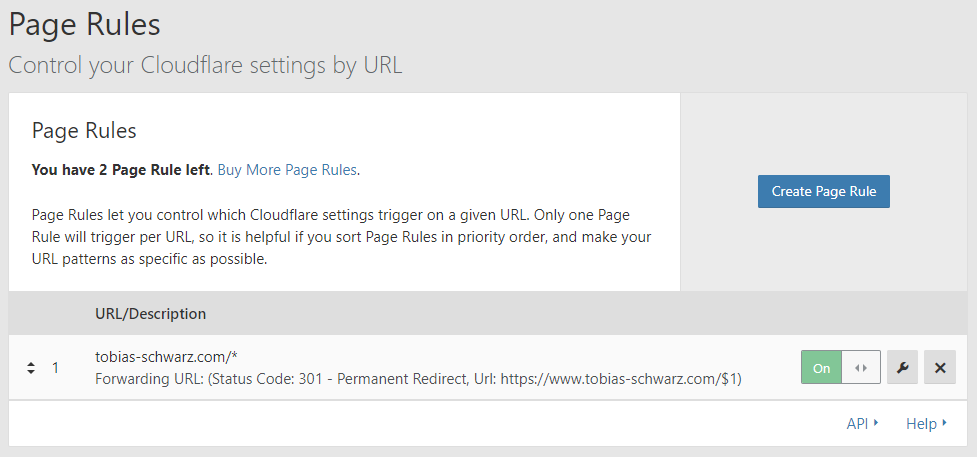
Final thoughts
I’m using this setup for several months now and it works really well for me. I have some plans to create my own template, but everything else works quite well. If you have any questions or suggestions to improve this setup further feel free to contact me.